
DIY adjustable circle cutting jig for router made of plywood
Like every new router owner ever I am starting to need some jigs to make work easier and more creative. The first project in my mind needed a circle cutting jig. Here is my take on how to build adjustable circle cutting jig for a plunge router.
I own a BochPOF 1400 ACE plunge router. It’s a great tool for the hobbyist like me and I wrote a detailed review on it. If you don’t own one yet- you should absolutely consider getting one.
My router came with a parallel guide which features also a centering pin for circle cutting. But I wanted to go be able to make smaller circles also. My DIY jig is also more rigid than included one.
The plan
Main features I wanted to cover was following:
- Fully adjustable center pin location – no preset holes
- The minimum possible circle should be smaller than router baseplate
I gathered some ideas from the internet and started to plan my version of circle jig. For adjusting, I needed centering pin with a slider and something to tighten it up. I used a knob with 8mm threaded bolt and a nut embedded into the slider. Since I didn’t have thick enough plywood (to route wider track below) I decided to go with 2 layer design. First one is base and the second one is for tightening up the slider.
Building
There is nothing much to explain. Pictures are self-explanatory. I removed the baseplate from the router and used that as a template for drilling holes into plywood. I used 10mm plywood for this project. Don’t forget to countersink them to have much as possible plunge depth and smooth surface. By using other plywood as a fence I created the main slot for a slider. This slot must be wider so the sliding block will be fixed against plywood on top.
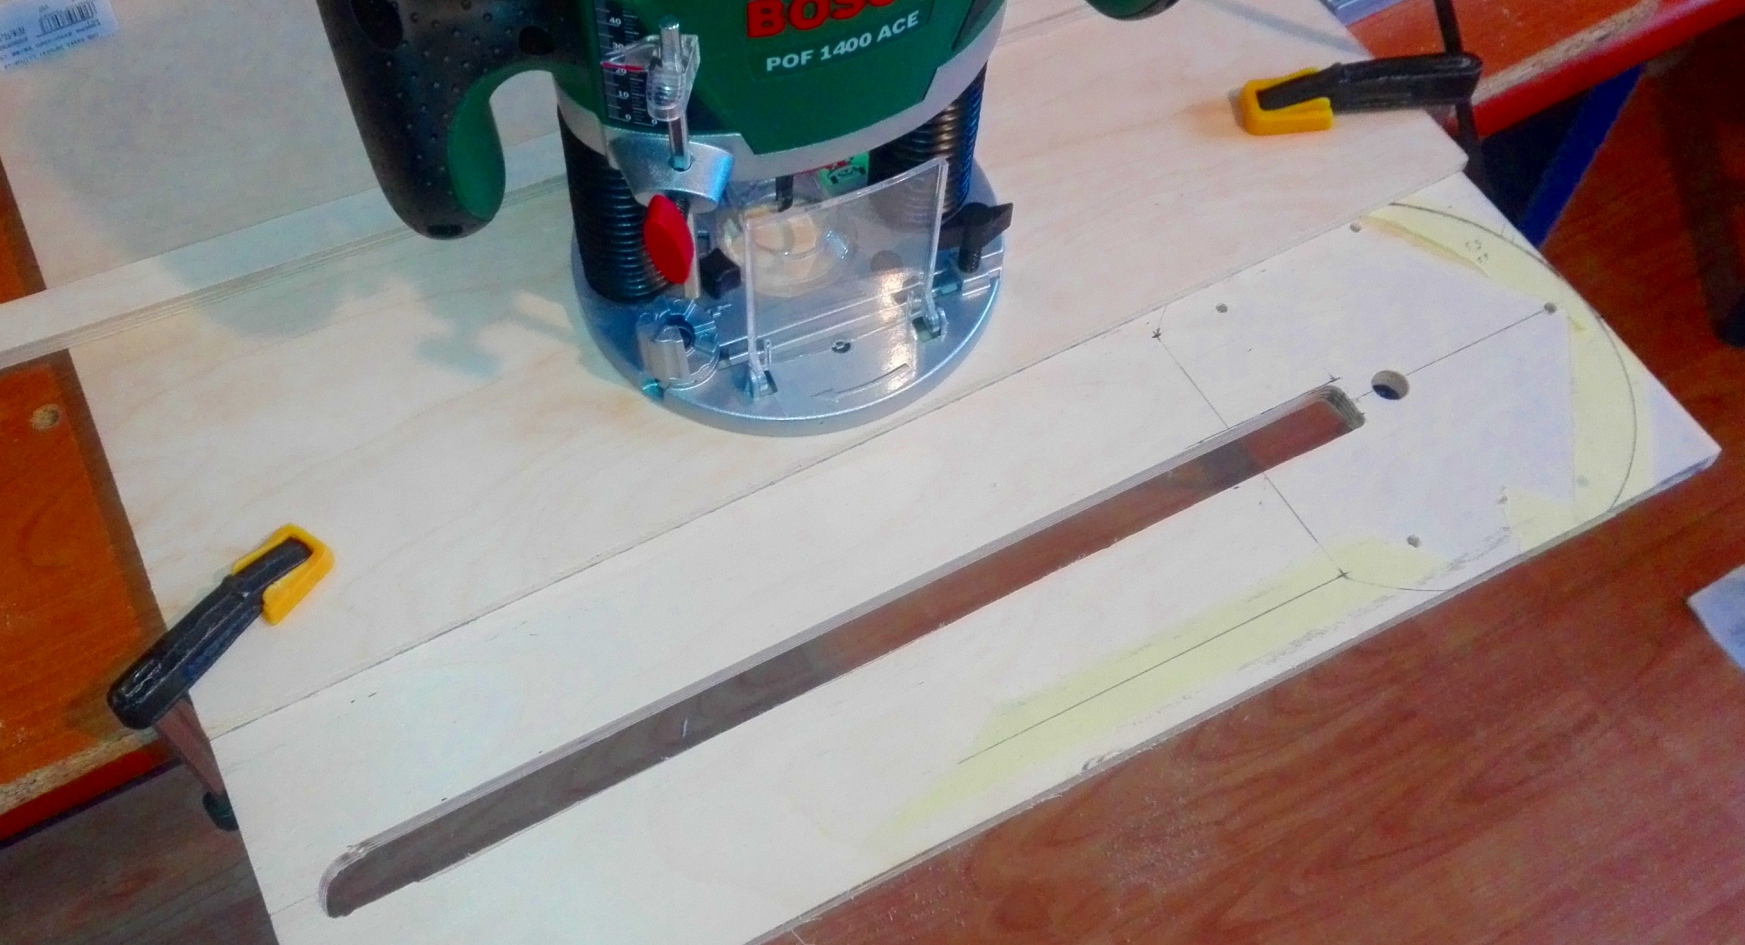
Track for a sliding block in the plywood base
The second slot was easier to do. I had 8mm router bit and knob had also 8mm thread. The slider is simply a block of plywood that fits snugly into the main slot.
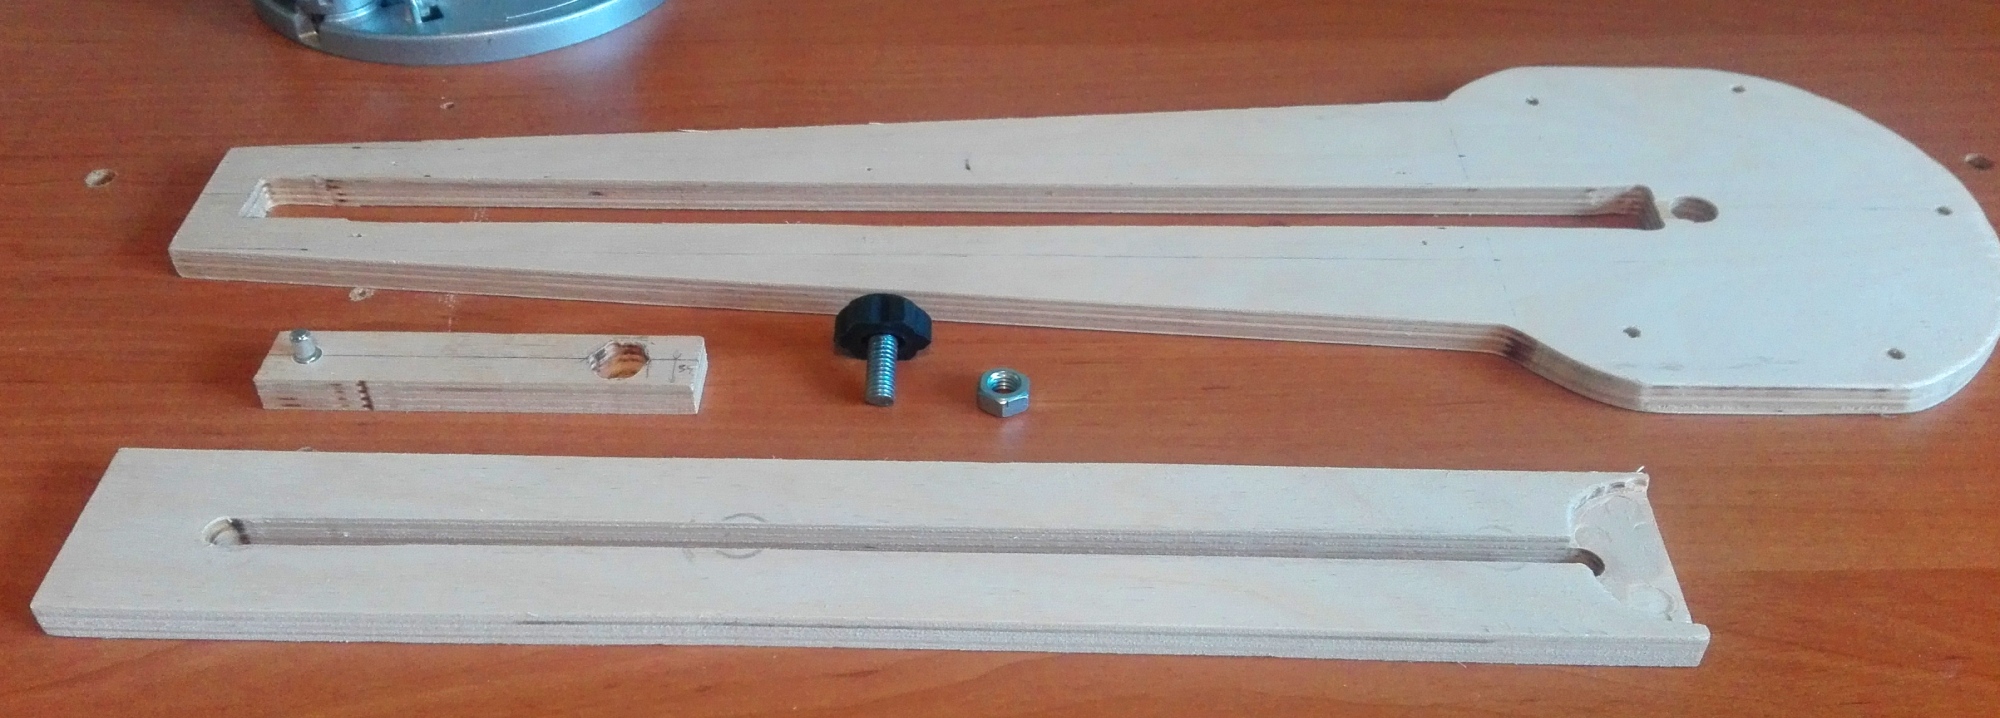
Adjustable circle cutting jig for router ready to be assembled
Mind the dust collector outlet. I didn’t and I had to hack away some plywood to fit it.
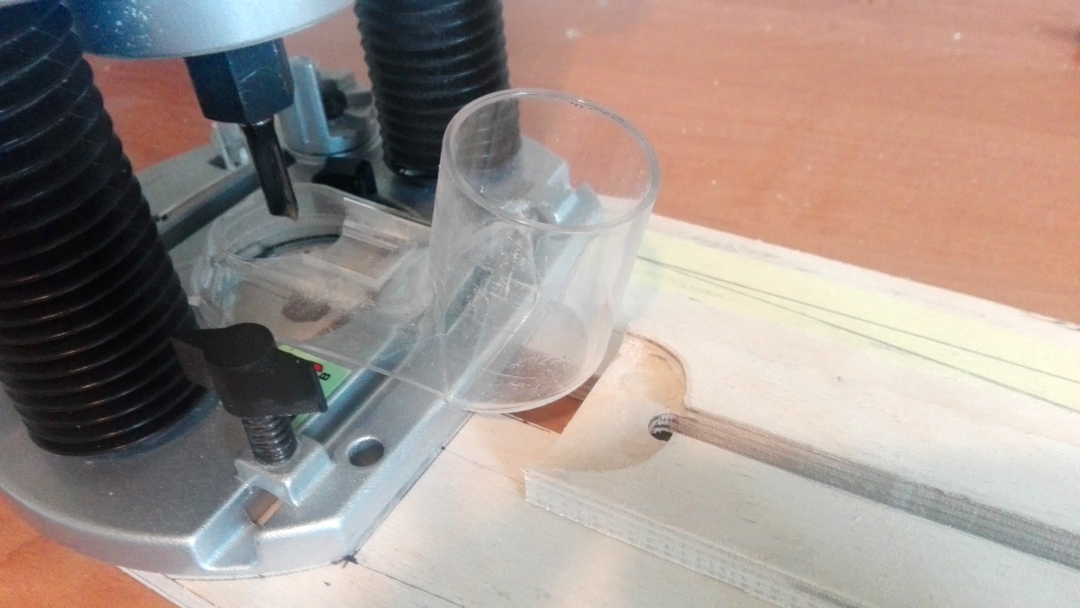
Mind the dust collector
After everything is cut out the only thing to do is assemble it and try first cut.
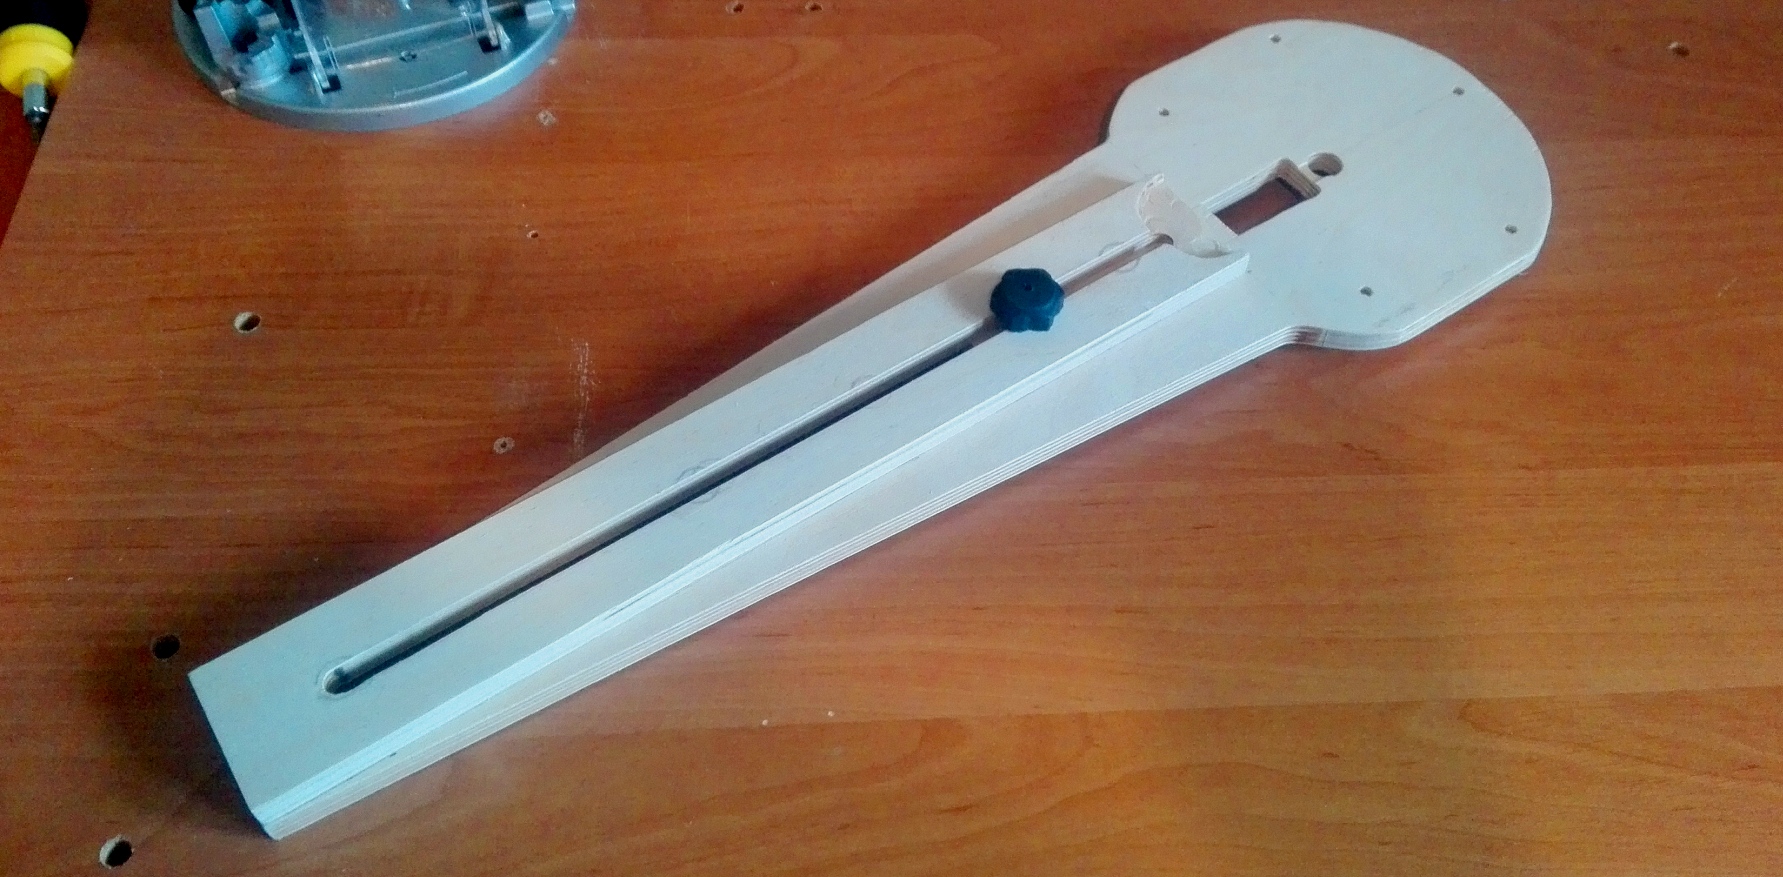
Assembled jig
Centering pin and radius of the circle
I used a shelf peg for centering pin. It seemed to be a perfect fit for this application. But it’s always possible to make it out of the small bolt and a nut or piece of metal rod. I can make pretty small circles with this jig. This is achieved by the clever design of the pin and sliding slot. As you can see from photo – pin is underneath the router when cutting smaller circles.
A problem that I didn’t take into account at first was the length of the arm. So it’s good that I didn’t make it much longer. This arm is going to rotate and you need whole are cleared for the cut. This smaller jig already is a bit of a challenge in tight conditions.

A closer look below the jig
I drew small lines to make measuring radius easier underneath the base.
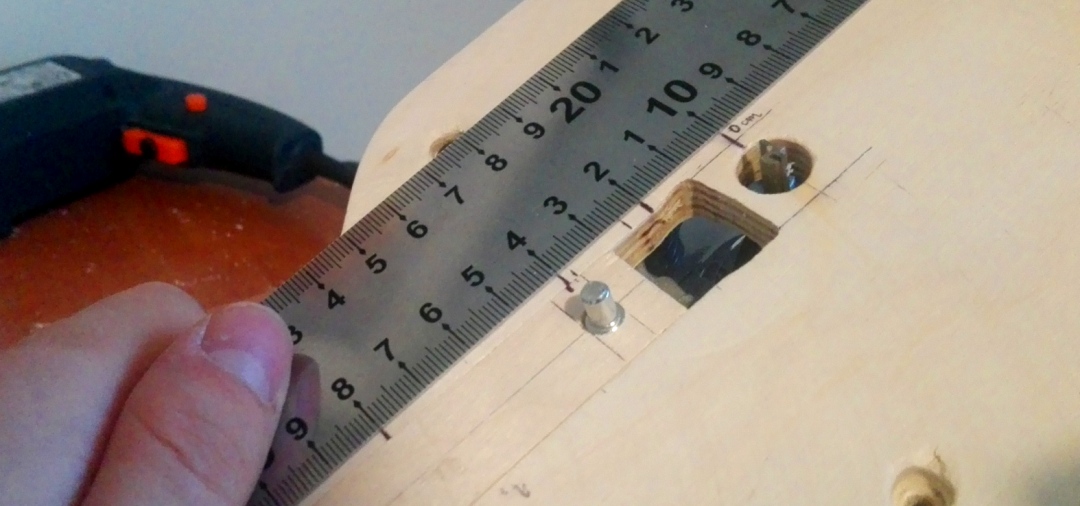
Measuring and setting circle radius using a ruler
Possible improvements
Some ideas I came up with that might be useful.
- The plunge hole should be bigger or base plywood should be thinner so it’s possible to see where router bit is going to be. It’s not too much of a problem, but it would be more comfortable if it would be possible to see workpiece. It makes dust and chips collection also better. Thinner base robs less valuable plunge depth also.
- Attaching the jig is a bit of a process. Routers usually have a template guide adapter included. Next time I would investigate option to use that instead for quick connecting to the jig (actually any jig). Or maybe some kind of clamping solution to clamp router via it’s base to the jig.
- Should somehow embed a ruler into the mix. I am thinking along lines of just screwing a ruler underneath the jig so it would be flat with the surface. But a better option would be on top probably.
The first cut
I made first cut into the acrylic glass. It looks messy, but plexiglass has a protective film on it. After removing the result was clear and nice. Centering pin works well and the whole cut was accurate and matched up perfectly. But I hate calculation part of the routing. Always have to keep in mind which way to add tool diameter. Not only for circles, but everything is done so far (I had to move fence many times to for correct position). Hopefully, these rookie mistakes going to fade away soon.
On this picture, you see also another problem I didn’t think of before. Rotating arm means no way to place clamps over the workpiece. I used masking tape to hold everything from moving along. A double-sided tape is probably a better option here.
I was building splash guard for our KitchenAid Mini stand mixer.
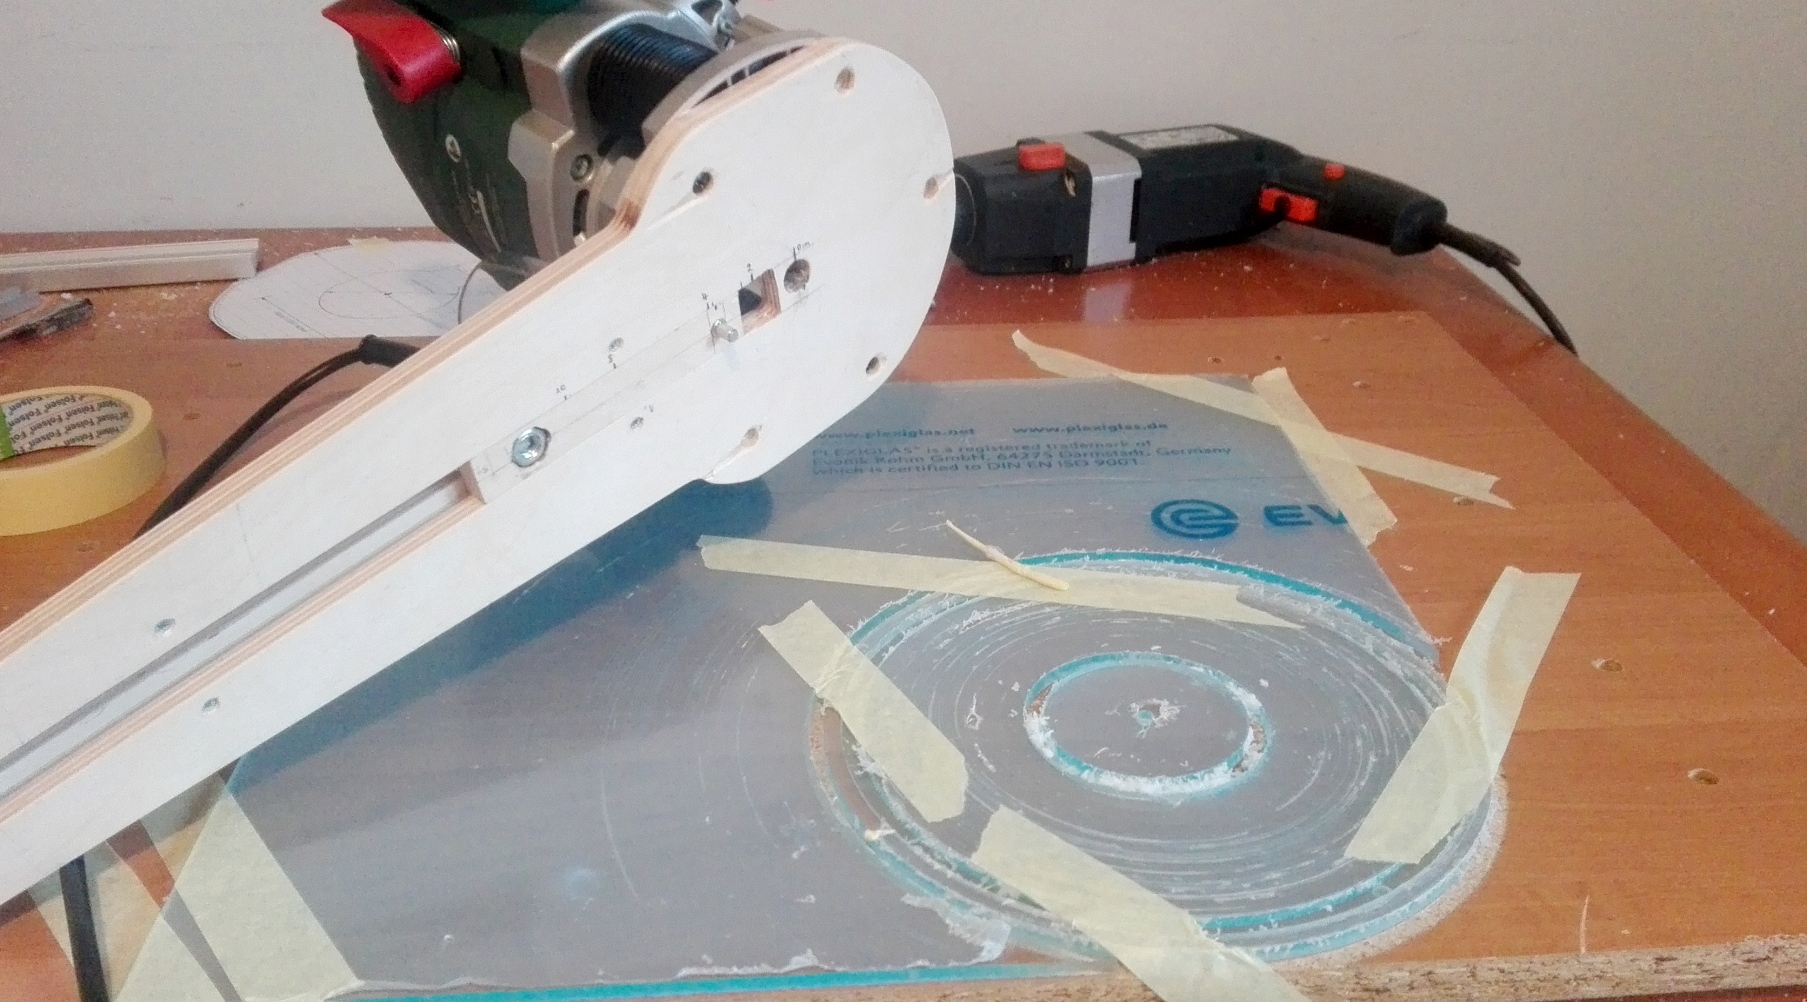
First cuts with the adjustable circle cutting jig
Summary
I am very pleased already with the jig. The first project is already done and some ideas forming up. Brother made a joke about sub-woofer cutting business. But no joke there. Same time I read from some forum that Jasper circle jig (find it on Amazon.com, Amazon.co.uk or Amazon.de), for example, was originally developed for cutting holes for speakers. It has preset holes that suppose to match up perfectly with regular speaker sizes, but I don’t know is it true though.
If you have any questions about jig, building it or using it – feel free to post a comment.

How would you cut a radius out of the corners of plywood without then cutting into the main body of the plywood?
Hi.
If I understand your question correctly – for round corner cutting, people use corner jig/templates instead. I guess with circle jig it’s hard to stop at correct moment.