Tabbing solar cells together using this simple jig
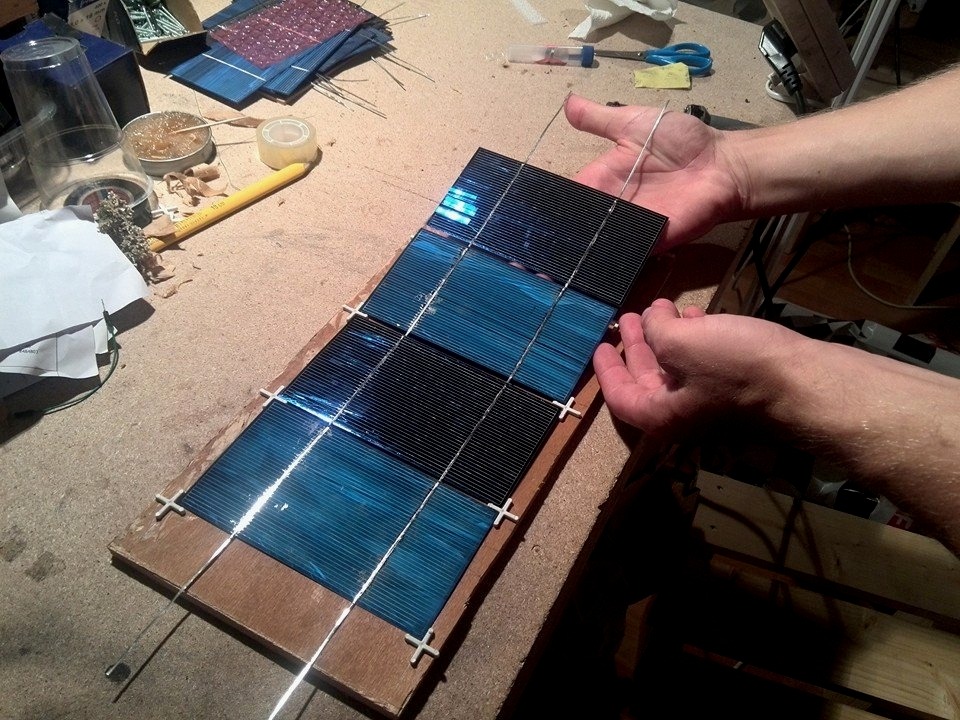
Here is a simple solution to align and fixate cells while tabbing solar cells together. This is very good because I can focus on soldering solar cells together instead how they are aligned and fixed. People also use tape to fixate and long ruler or something similar to align them beforehand. This is different solution. Maybe it gives someone idea for tabbing. It’s actually not a new idea- I have found that people have used this idea before. First link I found was on instructables.
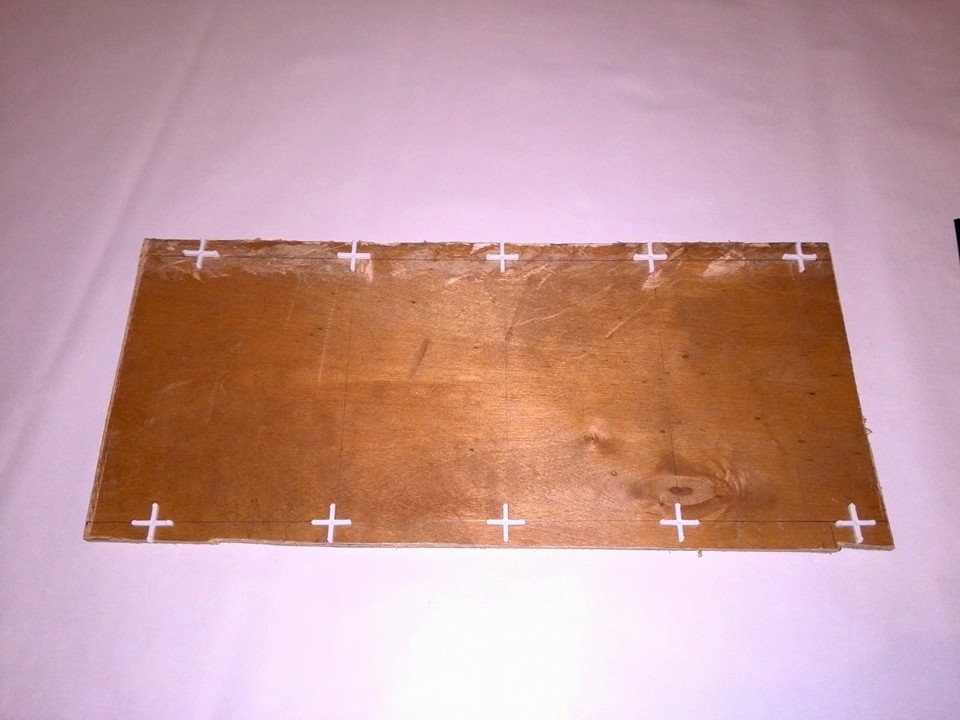
Here I use 2.5mm (~0.09 inches) plastic tile spacers which can be found in your local hardware store at low price. Super glue and a piece of scrap plywood for base. I just glued crosses on plywood – seems to hold good enough. And it’s done.
I have little loose spacing so cells won’t be too tightly inside corners. It prevents damaging cells when removing them from jig.
Photos of tabbing solar cells with this jig
Some photos of the tabbing and actual building of my bigger panel.

Solar cells tabbing jig using tile spacers – used materials
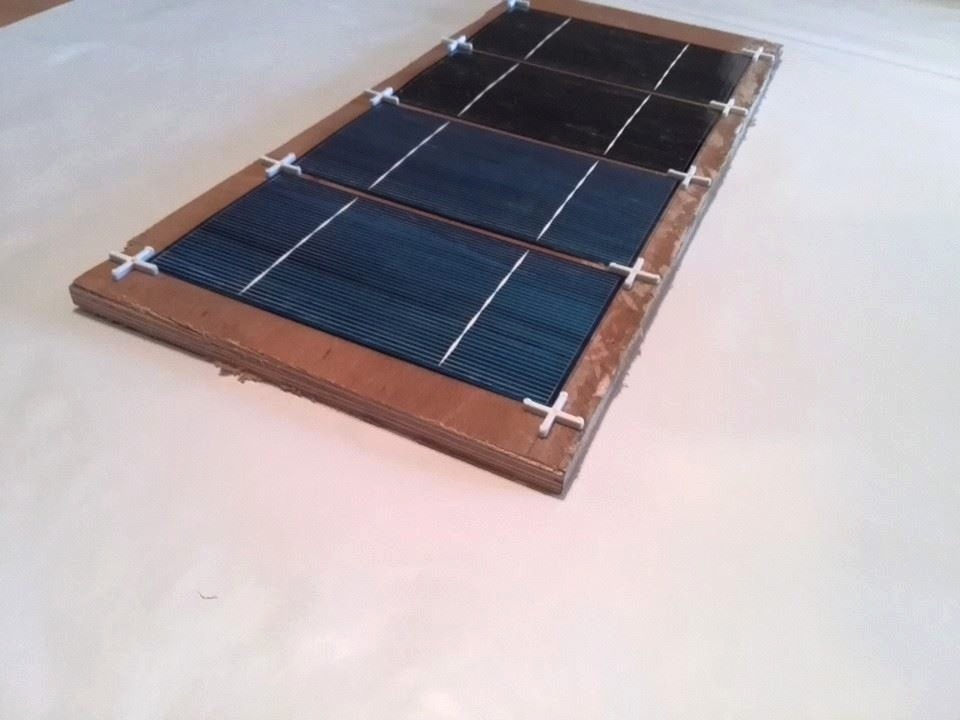
Tabbing solar cells using jig made out of tile spacers
Solar cells tabbing jig using tile spacers – overview 2
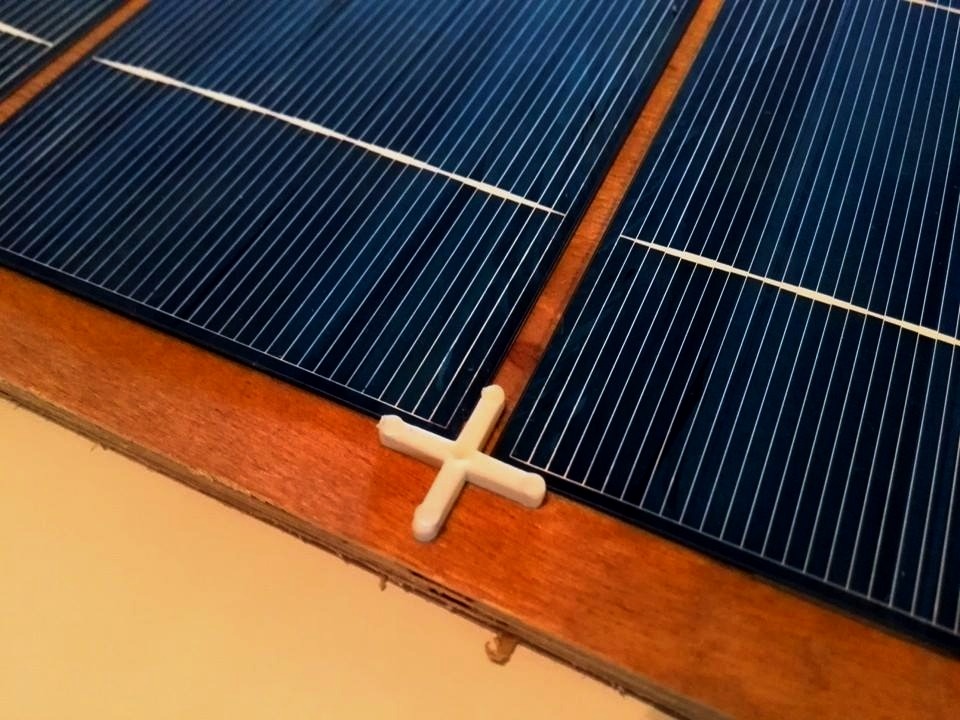
Solar cells tabbing jig using tile spacers – closer look
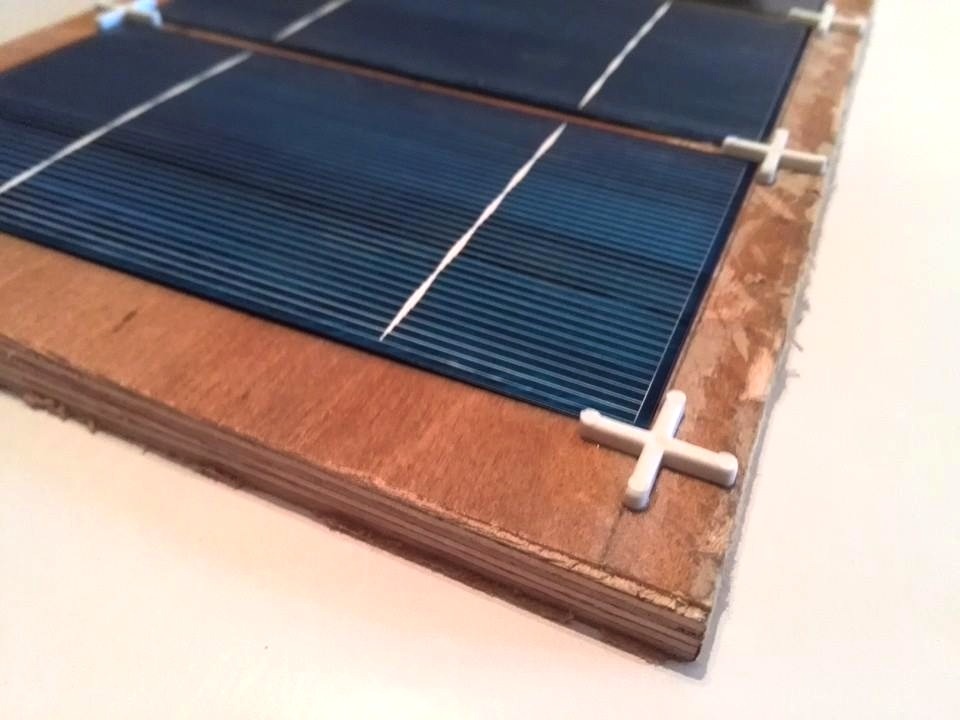
Solar cells tabbing jig using tile spacers – closer look 2
Solar cells tabbing jig using tile spacers – removing cells from jig
Conclusion
My first solar cell arrays came out good. No drawbacks nor problems rise up at moment. The whole project building my first (OK- actually it was second panel I built) solar panel also succeeded at least in aligning part. Now I also have post about that panel’s performance if interested. Check it out in my other post: My DIY 65W solar panel testing.

Hi bro,
Where do you find spare solar cells ?
Thanx
I bought my ones on e-bay via auction. Got some on cheap.